| Sometimes i like to use my own handwriting on my scrapbooking layouts, its just something a little different but also nice to have every now and then. First let me start off by saying there are probably many ways to do this, but as I am not that computer savvy, this is the only way I know - right or wrong:) |
THE HOW TO:
1. draw your design
1. draw your design

2. scan your image and upload into your computer
- if connected to your computer this should load up straight away for you
- if like me, you work on a laptop, scan your image onto a USB drive
(these days there are some scan apps you can get on your ipad or phone to scan your image, but at the moment the few that i've tried don't give as great a quality as doing it through a proper scanner but if you don't have one it is the next best thing - i will do a tute on this soon for you).
3. upload image to your computer
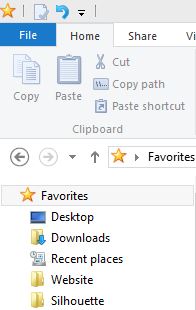
4. save image in your silhouette folder
- i have my silhouette folder in the "files explorer" section under favorites in my computer
- then in my silhouette folder I have created a new file just to place my scans
- if connected to your computer this should load up straight away for you
- if like me, you work on a laptop, scan your image onto a USB drive
(these days there are some scan apps you can get on your ipad or phone to scan your image, but at the moment the few that i've tried don't give as great a quality as doing it through a proper scanner but if you don't have one it is the next best thing - i will do a tute on this soon for you).
3. upload image to your computer
4. save image in your silhouette folder
- i have my silhouette folder in the "files explorer" section under favorites in my computer
- then in my silhouette folder I have created a new file just to place my scans
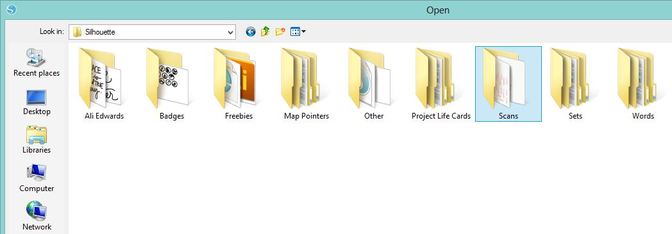
5. open silhouette program
6. locate folder scan is in, then open scan up in the silhouette program
6. locate folder scan is in, then open scan up in the silhouette program
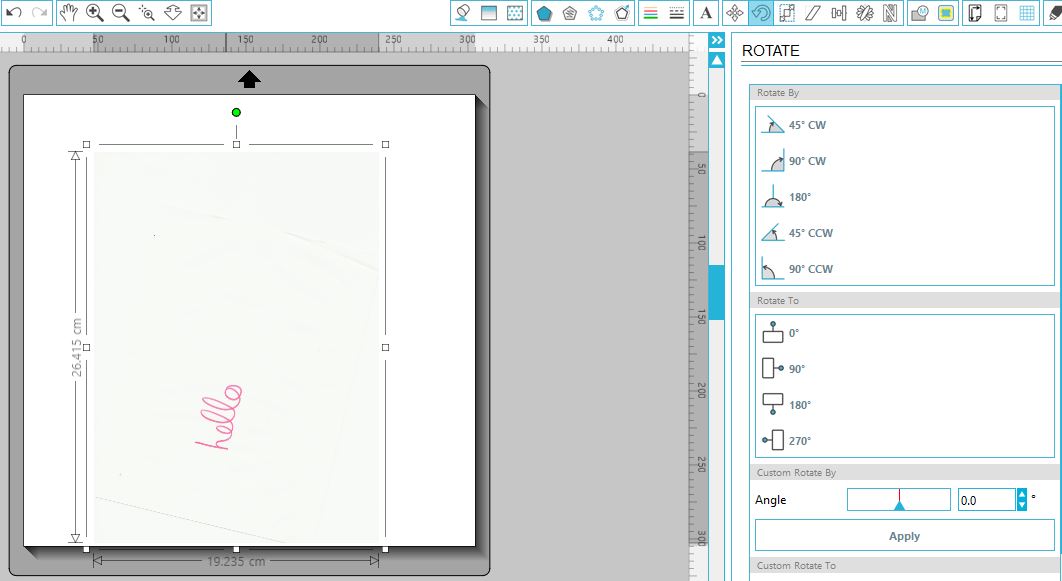
7. select image then rotate to correct orientation (this isn't necessary but I just like doing it)
- there are two options for this:
1. place your mouse icon over the green spot above your image & turn
2. press the rotate option in the top right menu list, then select which direction you want to rotate
- there are two options for this:
1. place your mouse icon over the green spot above your image & turn
2. press the rotate option in the top right menu list, then select which direction you want to rotate
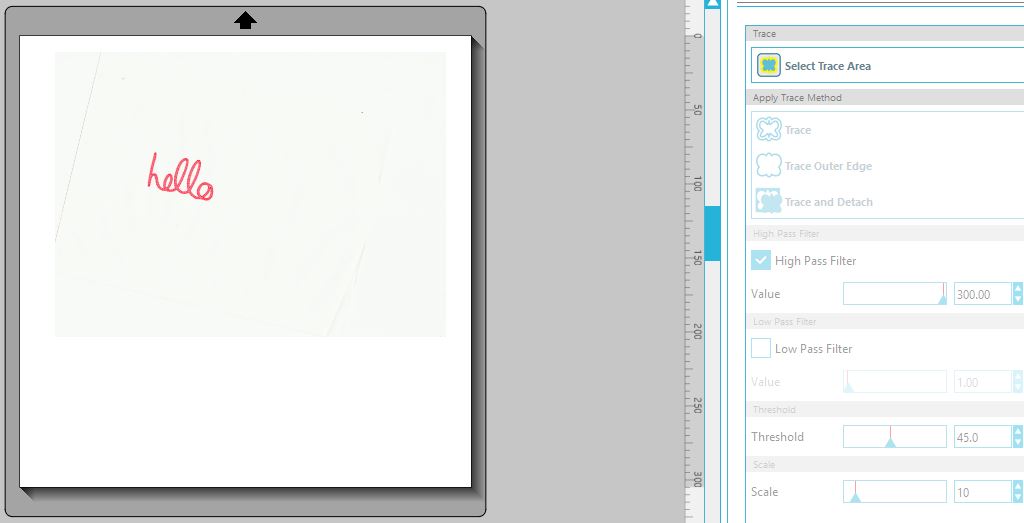
8. select the trace option from the top right menu and select trace area
9. draw a nice square around your design, making sure all parts of the image are within your box
9. draw a nice square around your design, making sure all parts of the image are within your box
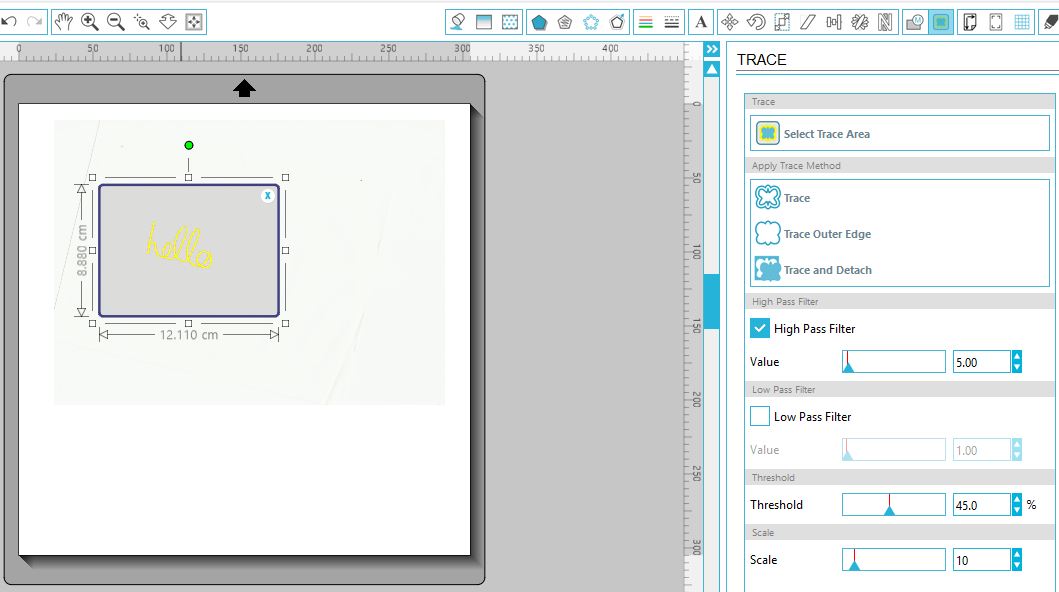
10. play around with the high pass filter (& low pass) sliding bars - located in your trace menu, untill ALL your image is selected in YELLOW
- as a general rule, i usually just turn the high pass filter up to 300 and that seems to do the job most of the time (however sometimes you need less and sometimes you just need a tad more of the image highlighted and by selecting the low pass filter option without actually moving the bar just adds that final extra touch of filling in the edges)
- as a general rule, i usually just turn the high pass filter up to 300 and that seems to do the job most of the time (however sometimes you need less and sometimes you just need a tad more of the image highlighted and by selecting the low pass filter option without actually moving the bar just adds that final extra touch of filling in the edges)
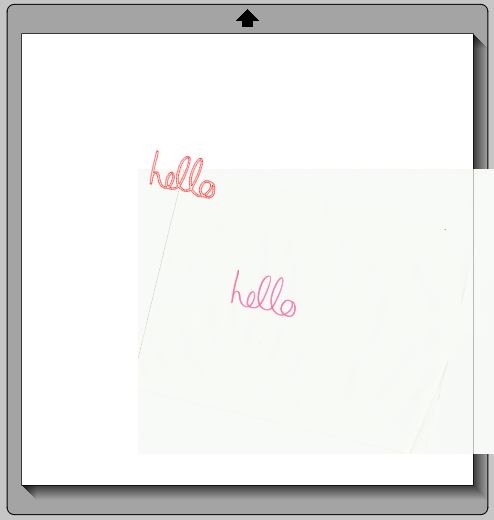
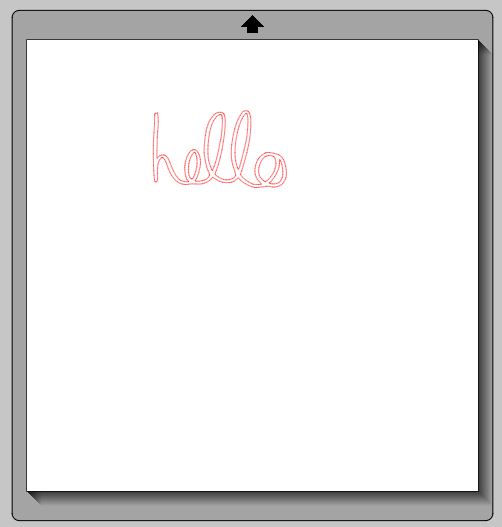
11. press trace (first option under the select trace area - in above photo) then click on original scan image and delete that so that you are left with a trace of your image with the difference being you can now cut this with your silhouette machine.
 |  |

If you know of a better way please feel free to give some tips in the comments below :)
* if you find your design is too intricate to cut i will be putting up a tutorial soon to show you how to thicken your image to get a great cut!