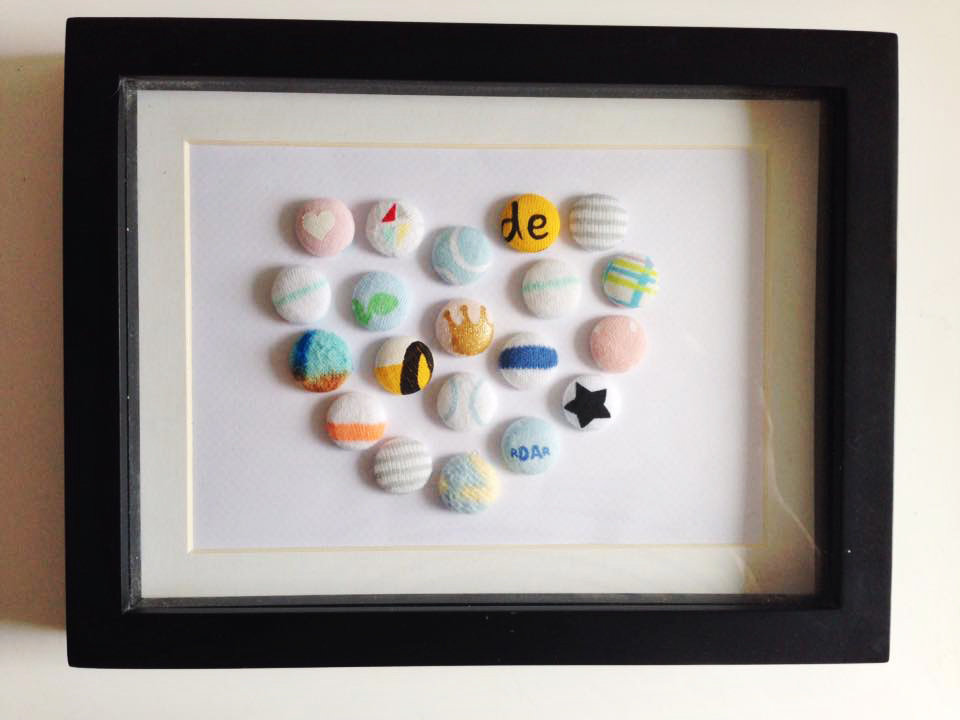
 | Ever had leftover baby clothes that you absolutely love, but just can't part with and therefore have no idea what to do with them other than to leave them in a box somewhere? I originally saw this idea on pinterest from a lady (sue smith) on etsy, however the link to the actual site where she makes these no longer exist. So i decided to bite the bullet and take a crack at it and have to say i am so so happy with the result. |
THINGS YOU NEED:
- leftover baby clothes
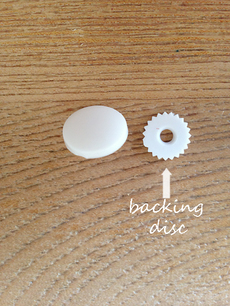
- around 20 plastic self covering buttons (if you want to make a heart shape)
(i found mine on ebay and chose to use the 15mm size: http://www.ebay.com.au/itm/Plastic-Self-Cover-Buttons-White-Choose-From-11mm-15mm-18mm-22mm-29mm-38mm-/361418706925?var=&hash=item54263bcfed:m:mj855uYwf1mOptJXyg98_Sg)
- some double sided craft tape
- scissors
- a sewing needle/ toothpick or a craft piercing tool - anything sturdy and pointy to help poke the material under the disc
- a piece of cardstock or cardboard paper cut to fit your frame
- 3D or box frame
- leftover baby clothes
- around 20 plastic self covering buttons (if you want to make a heart shape)
(i found mine on ebay and chose to use the 15mm size: http://www.ebay.com.au/itm/Plastic-Self-Cover-Buttons-White-Choose-From-11mm-15mm-18mm-22mm-29mm-38mm-/361418706925?var=&hash=item54263bcfed:m:mj855uYwf1mOptJXyg98_Sg)
- some double sided craft tape
- scissors
- a sewing needle/ toothpick or a craft piercing tool - anything sturdy and pointy to help poke the material under the disc
- a piece of cardstock or cardboard paper cut to fit your frame
- 3D or box frame
 |  |
WHAT TO DO:
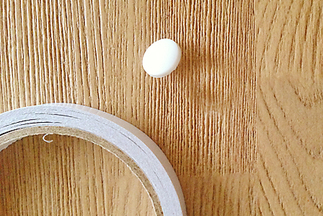
1. get a button, cut off a small piece of double sided tape and stick onto the top.
1. get a button, cut off a small piece of double sided tape and stick onto the top.
2. next place your button (sticky side down) onto your piece of material and cut roughly a 0.6-7mm edge around the button.
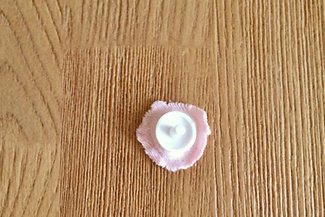
3. place the backing disc for the button on and gently press it down a little - but not fully as you need to leave a little space for the material to fit (also if one side of the disc has little bumps on it, place this side down towards the button)
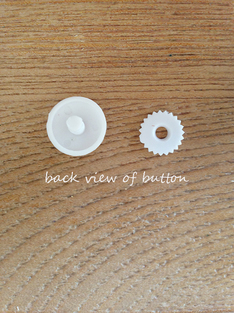
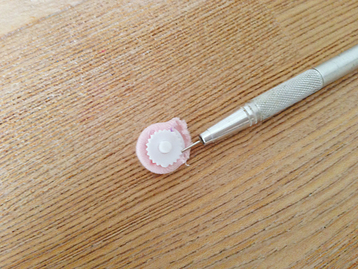
4. fold and poke the material over the button edge and under the disc, keep poking until it fits nicely under it and the edges of the button are smooth (if you find the material keeps popping back out, press the disc down a little further).
4. fold and poke the material over the button edge and under the disc, keep poking until it fits nicely under it and the edges of the button are smooth (if you find the material keeps popping back out, press the disc down a little further).
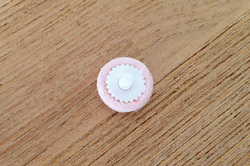
5. press the disc down as firmly and as far as it will go (if you find its not going down easily, just get a pen or a spoon and use the end to press down onto the disc) and there you have it your button is done!
 |  |
6. repeat the above steps as many times as you like to make the shape you're after
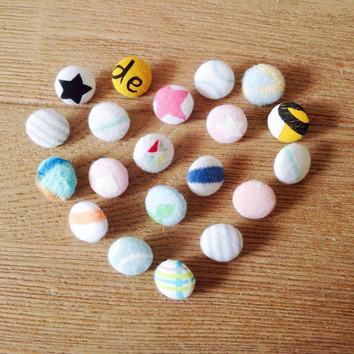
7.cut a piece of cardboard or cardstock paper out to fit inside the frame you have bought.
8. on the cardstock space out all your buttons into the shape you would like them to be
9. next lift up each button individually and mark with a pen the spot where it is to go on the cardboard (make sure you place the button back in its spot to help keep the shape and the spacing between the other buttons in proportion. repeat this step till all buttons have been marked
11. remove all the buttons from the cardboard and with a craft knife, stanly knife or any sharp knife gently place a small cut over the pen marks for each button. then stick each button through each cut.
12. put the backing of the frame on and display anywhere :)