
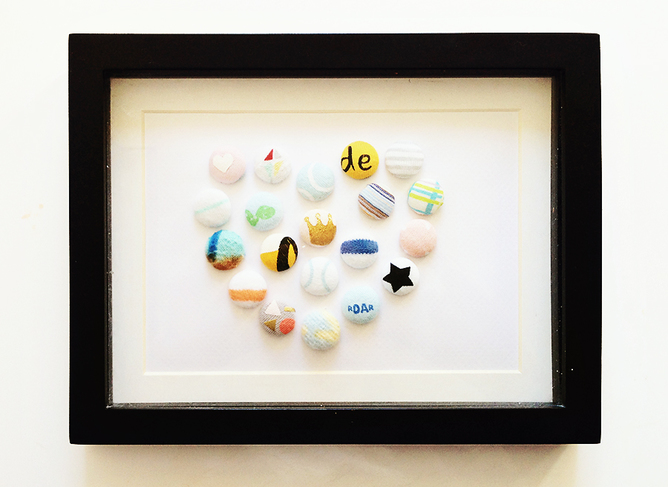
Ok, I have to admit, I have a few baby clothes left-over from when my kids were...well..babies. They are my absolute favorite and although they'd never see the light of day again, for some silly reason I just don't want to chuck them out. So when I saw this idea of using baby clothes to create buttons for a keepsake frame I thought you little rippa - that's awesome, i'm doing it.
I originally saw this idea on pinterest, but it came from suesmith30's etsy shop. However, it seems that she has stopped making them so I thought I'd give it a go and do my own 'how to' in the meantime.
WHAT YOU NEED:
- left-over baby clothes
- self covering buttons (i used the 15mm size ones from ebay)
- sizzors
- double sided tape
- toothpick (or craft pricking tool)
- piece of cardboard
- deep frame or shadow frame.
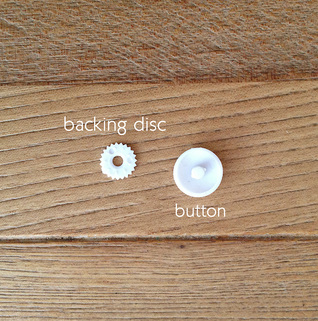
1. Grab your button and its backing disc (this is the part that clips onto the back of the button and holds everything together.
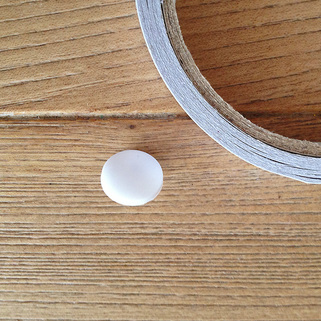
2. Cover top of button (the dome part) with some double-sided craft tape (can get this at $2 shops, kmart, craft stores etc..)
2. Cover top of button (the dome part) with some double-sided craft tape (can get this at $2 shops, kmart, craft stores etc..)
 |  |
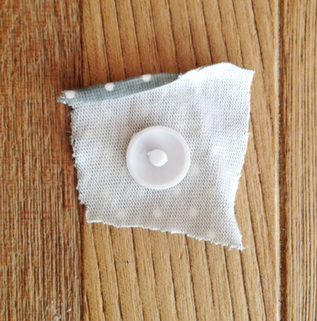
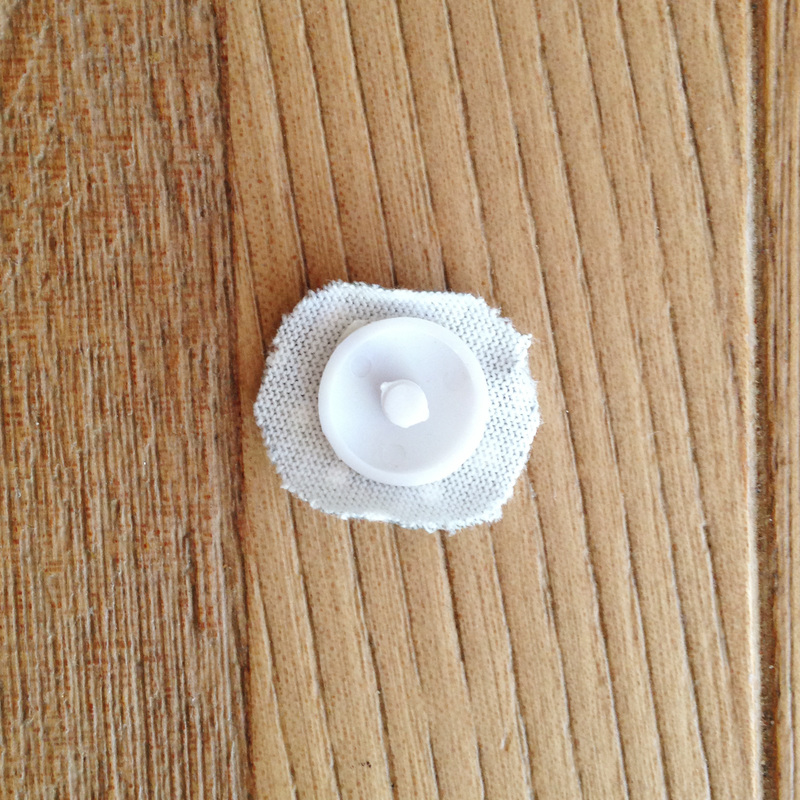
3. Ok, now for some this next part might be hard - but you can do it...Take your baby clothes and cut a small section off, then stick button firmly down onto it (make sure the fabric is facing the right way - you want the back of the fabric to be stuck to the button and not the patterned side)
4. Now trim off any excess fabric, but make sure you leave enough so that it folds under the edge of the button nicely. Its much easier to trim off a little at a time, so that you don't cut too much off and have to start again.
4. Now trim off any excess fabric, but make sure you leave enough so that it folds under the edge of the button nicely. Its much easier to trim off a little at a time, so that you don't cut too much off and have to start again.
 |  |
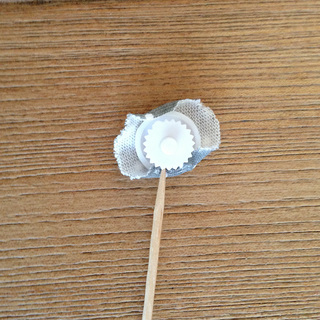
5. Place the backing disc on and press down most - but NOT ALL THE WAY (i usually press it down about 3/4 of the way).
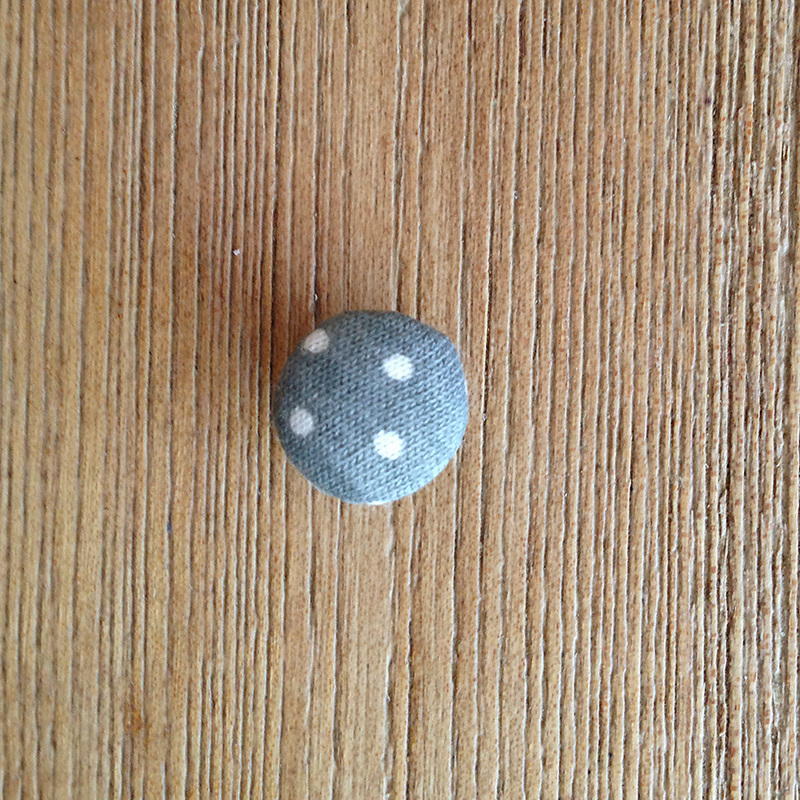
6. Then grab a toothpick (or something pointy) and poke the material underneath the disc. Once done, press the disc down all the way until you hear a 'click' and wallah...Button Done!
6. Then grab a toothpick (or something pointy) and poke the material underneath the disc. Once done, press the disc down all the way until you hear a 'click' and wallah...Button Done!
 |  |
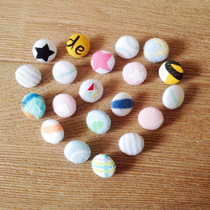
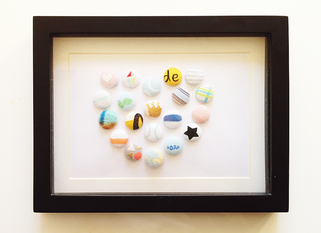
7. Make More...Now, depending on how you want to display them in your frame will depend on how many you need to make. I'm doing a 'heart frame' so I made 20 (and yes, the button in the tutorial is not in the below picture, sorry about that).
********************* STEPS 8-9 ARE JUST WRITTEN STEPS******************************
8. Get some cardboard, cut it down to fit into frame. Then grab your buttons and place onto the cardboard in the shape you want. Mark each spot using a pencil.
9. Next grab the toothpick again (or a craft pricking tool) and poke holes through each of the marked spots, then place your buttons through each hole.
10. Once done, put your design into the frame and your baby clothes keepsake frame is done!
* if you find the buttons slip out, just put some blue-tac, double sided tape or some glue at the back of the button so it stays right where you want it to.
* also, before going to all this effort make sure your frame is deep enough to fit the buttons in, that's why a shadow box may be good to use.
* for the quick 'how to' version click here.
 |  |
 RSS Feed
